Annunciromasexy
by piccoletrasgressioni.it
MENU
HOME SITE
GIRLS
Abruzzo
Abruzzo
Chieti
L'Aquila
Pescara
Teramo
Basilicata
Basilicata
Matera
Potenza
Calabria
Calabria
Catanzaro
Cosenza
Crotone
Reggio Calabria
Vibo Valentia
Campania
Campania
Avellino
Benevento
Caserta
Napoli
Salerno
Emilia Romagna
Emilia Romagna
Bologna
Ferrara
Forli-Cesena
Modena
Parma
Piacenza
Ravenna
Reggio Emilia
Rimini
San Marino
Friuli Venezia Giulia
Friuli Venezia Giulia
Gorizia
Pordenone
Trieste
Udine
Lazio
Lazio
Frosinone
Latina
Rieti
Roma
Viterbo
Liguria
Liguria
Genova
Imperia
La Spezia
Savona
Lombardia
Lombardia
Bergamo
Brescia
Como
Cremona
Lecco
Lodi
Mantova
Milano
Monza-Brianza
Pavia
Sondrio
Varese
Marche
Marche
Ancona
Ascoli Piceno
Fermo
Macerata
Pesaro-Urbino
Molise
Molise
Campobasso
Isernia
Piemonte
Piemonte
Alessandria
Asti
Biella
Cuneo
Novara
Torino
Verbano Cusio Ossola
Vercelli
Puglia
Puglia
Bari
Barletta Andria Trani
Brindisi
Foggia
Lecce
Taranto
Sardegna
Sardegna
Cagliari
Carbonia-Iglesias
Nuoro
Olbia Tempio
Oristano
Medio Campidano
Sassari
Ogliastra
Sicilia
Sicilia
Agrigento
Caltanissetta
Catania
Enna
Messina
Palermo
Ragusa
Siracusa
Trapani
Toscana
Toscana
Arezzo
Firenze
Grosseto
Livorno
Lucca
Massa Carrara
Pisa
Pistoia
Prato
Siena
Trentino Alto Adige
Trentino Alto Adige
Bolzano
Trento
Umbria
Umbria
Perugia
Terni
Valle d'Aosta
Valle d'Aosta
Aosta
Veneto
Veneto
Belluno
Padova
Rovigo
Treviso
Venezia
Verona
Vicenza
Estero
Estero
Austria
Belgio
Brasile
Danimarca
Emirati Arabi
Finlandia
Francia
Germania
Inghilterra
Irlanda
Lussemburgo
Norvegia
Paesi Bassi
Portogallo
Repubblica Ceca
Malta
Romania
Spagna
Svezia
Svizzera
Stati Uniti
Ungheria
ESCORT
Abruzzo
Abruzzo
Chieti
L'Aquila
Pescara
Teramo
Basilicata
Basilicata
Matera
Potenza
Calabria
Calabria
Catanzaro
Cosenza
Crotone
Reggio Calabria
Vibo Valentia
Campania
Campania
Avellino
Benevento
Caserta
Napoli
Salerno
Emilia Romagna
Emilia Romagna
Bologna
Ferrara
Forli-Cesena
Modena
Parma
Piacenza
Ravenna
Reggio Emilia
Rimini
San Marino
Friuli Venezia Giulia
Friuli Venezia Giulia
Gorizia
Pordenone
Trieste
Udine
Lazio
Lazio
Frosinone
Latina
Rieti
Roma
Viterbo
Liguria
Liguria
Genova
Imperia
La Spezia
Savona
Lombardia
Lombardia
Bergamo
Brescia
Como
Cremona
Lecco
Lodi
Mantova
Milano
Monza-Brianza
Pavia
Sondrio
Varese
Marche
Marche
Ancona
Ascoli Piceno
Fermo
Macerata
Pesaro-Urbino
Molise
Molise
Campobasso
Isernia
Piemonte
Piemonte
Alessandria
Asti
Biella
Cuneo
Novara
Torino
Verbano Cusio Ossola
Vercelli
Puglia
Puglia
Bari
Barletta Andria Trani
Brindisi
Foggia
Lecce
Taranto
Sardegna
Sardegna
Cagliari
Carbonia-Iglesias
Nuoro
Olbia Tempio
Oristano
Medio Campidano
Sassari
Ogliastra
Sicilia
Sicilia
Agrigento
Caltanissetta
Catania
Enna
Messina
Palermo
Ragusa
Siracusa
Trapani
Toscana
Toscana
Arezzo
Firenze
Grosseto
Livorno
Lucca
Massa Carrara
Pisa
Pistoia
Prato
Siena
Trentino Alto Adige
Trentino Alto Adige
Bolzano
Trento
Umbria
Umbria
Perugia
Terni
Valle d'Aosta
Valle d'Aosta
Aosta
Veneto
Veneto
Belluno
Padova
Rovigo
Treviso
Venezia
Verona
Vicenza
Estero
Estero
Austria
Belgio
Brasile
Danimarca
Emirati Arabi
Finlandia
Francia
Germania
Inghilterra
Irlanda
Lussemburgo
Norvegia
Paesi Bassi
Portogallo
Repubblica Ceca
Malta
Romania
Spagna
Svezia
Svizzera
Stati Uniti
Ungheria
TRANSEX
Abruzzo
Abruzzo
Chieti
L'Aquila
Pescara
Teramo
Basilicata
Basilicata
Matera
Potenza
Calabria
Calabria
Catanzaro
Cosenza
Crotone
Reggio Calabria
Vibo Valentia
Campania
Campania
Avellino
Benevento
Caserta
Napoli
Salerno
Emilia Romagna
Emilia Romagna
Bologna
Ferrara
Forli-Cesena
Modena
Parma
Piacenza
Ravenna
Reggio Emilia
Rimini
San Marino
Friuli Venezia Giulia
Friuli Venezia Giulia
Gorizia
Pordenone
Trieste
Udine
Lazio
Lazio
Frosinone
Latina
Rieti
Roma
Viterbo
Liguria
Liguria
Genova
Imperia
La Spezia
Savona
Lombardia
Lombardia
Bergamo
Brescia
Como
Cremona
Lecco
Lodi
Mantova
Milano
Monza-Brianza
Pavia
Sondrio
Varese
Marche
Marche
Ancona
Ascoli Piceno
Fermo
Macerata
Pesaro-Urbino
Molise
Molise
Campobasso
Isernia
Piemonte
Piemonte
Alessandria
Asti
Biella
Cuneo
Novara
Torino
Verbano Cusio Ossola
Vercelli
Puglia
Puglia
Bari
Barletta Andria Trani
Brindisi
Foggia
Lecce
Taranto
Sardegna
Sardegna
Cagliari
Carbonia-Iglesias
Nuoro
Olbia Tempio
Oristano
Medio Campidano
Sassari
Ogliastra
Sicilia
Sicilia
Agrigento
Caltanissetta
Catania
Enna
Messina
Palermo
Ragusa
Siracusa
Trapani
Toscana
Toscana
Arezzo
Firenze
Grosseto
Livorno
Lucca
Massa Carrara
Pisa
Pistoia
Prato
Siena
Trentino Alto Adige
Trentino Alto Adige
Bolzano
Trento
Umbria
Umbria
Perugia
Terni
Valle d'Aosta
Valle d'Aosta
Aosta
Veneto
Veneto
Belluno
Padova
Rovigo
Treviso
Venezia
Verona
Vicenza
Estero
Estero
Austria
Belgio
Brasile
Danimarca
Emirati Arabi
Finlandia
Francia
Germania
Inghilterra
Irlanda
Lussemburgo
Norvegia
Paesi Bassi
Portogallo
Repubblica Ceca
Malta
Romania
Spagna
Svezia
Svizzera
Stati Uniti
Ungheria
MISTRESS
Abruzzo
Abruzzo
Chieti
L'Aquila
Pescara
Teramo
Basilicata
Basilicata
Matera
Potenza
Calabria
Calabria
Catanzaro
Cosenza
Crotone
Reggio Calabria
Vibo Valentia
Campania
Campania
Avellino
Benevento
Caserta
Napoli
Salerno
Emilia Romagna
Emilia Romagna
Bologna
Ferrara
Forli-Cesena
Modena
Parma
Piacenza
Ravenna
Reggio Emilia
Rimini
San Marino
Friuli Venezia Giulia
Friuli Venezia Giulia
Gorizia
Pordenone
Trieste
Udine
Lazio
Lazio
Frosinone
Latina
Rieti
Roma
Viterbo
Liguria
Liguria
Genova
Imperia
La Spezia
Savona
Lombardia
Lombardia
Bergamo
Brescia
Como
Cremona
Lecco
Lodi
Mantova
Milano
Monza-Brianza
Pavia
Sondrio
Varese
Marche
Marche
Ancona
Ascoli Piceno
Fermo
Macerata
Pesaro-Urbino
Molise
Molise
Campobasso
Isernia
Piemonte
Piemonte
Alessandria
Asti
Biella
Cuneo
Novara
Torino
Verbano Cusio Ossola
Vercelli
Puglia
Puglia
Bari
Barletta Andria Trani
Brindisi
Foggia
Lecce
Taranto
Sardegna
Sardegna
Cagliari
Carbonia-Iglesias
Nuoro
Olbia Tempio
Oristano
Medio Campidano
Sassari
Ogliastra
Sicilia
Sicilia
Agrigento
Caltanissetta
Catania
Enna
Messina
Palermo
Ragusa
Siracusa
Trapani
Toscana
Toscana
Arezzo
Firenze
Grosseto
Livorno
Lucca
Massa Carrara
Pisa
Pistoia
Prato
Siena
Trentino Alto Adige
Trentino Alto Adige
Bolzano
Trento
Umbria
Umbria
Perugia
Terni
Valle d'Aosta
Valle d'Aosta
Aosta
Veneto
Veneto
Belluno
Padova
Rovigo
Treviso
Venezia
Verona
Vicenza
Estero
Estero
Austria
Belgio
Brasile
Danimarca
Emirati Arabi
Finlandia
Francia
Germania
Inghilterra
Irlanda
Lussemburgo
Norvegia
Paesi Bassi
Portogallo
Repubblica Ceca
Malta
Romania
Spagna
Svezia
Svizzera
Stati Uniti
Ungheria
BOYS
Abruzzo
Abruzzo
Chieti
L'Aquila
Pescara
Teramo
Basilicata
Basilicata
Matera
Potenza
Calabria
Calabria
Catanzaro
Cosenza
Crotone
Reggio Calabria
Vibo Valentia
Campania
Campania
Avellino
Benevento
Caserta
Napoli
Salerno
Emilia Romagna
Emilia Romagna
Bologna
Ferrara
Forli-Cesena
Modena
Parma
Piacenza
Ravenna
Reggio Emilia
Rimini
San Marino
Friuli Venezia Giulia
Friuli Venezia Giulia
Gorizia
Pordenone
Trieste
Udine
Lazio
Lazio
Frosinone
Latina
Rieti
Roma
Viterbo
Liguria
Liguria
Genova
Imperia
La Spezia
Savona
Lombardia
Lombardia
Bergamo
Brescia
Como
Cremona
Lecco
Lodi
Mantova
Milano
Monza-Brianza
Pavia
Sondrio
Varese
Marche
Marche
Ancona
Ascoli Piceno
Fermo
Macerata
Pesaro-Urbino
Molise
Molise
Campobasso
Isernia
Piemonte
Piemonte
Alessandria
Asti
Biella
Cuneo
Novara
Torino
Verbano Cusio Ossola
Vercelli
Puglia
Puglia
Bari
Barletta Andria Trani
Brindisi
Foggia
Lecce
Taranto
Sardegna
Sardegna
Cagliari
Carbonia-Iglesias
Nuoro
Olbia Tempio
Oristano
Medio Campidano
Sassari
Ogliastra
Sicilia
Sicilia
Agrigento
Caltanissetta
Catania
Enna
Messina
Palermo
Ragusa
Siracusa
Trapani
Toscana
Toscana
Arezzo
Firenze
Grosseto
Livorno
Lucca
Massa Carrara
Pisa
Pistoia
Prato
Siena
Trentino Alto Adige
Trentino Alto Adige
Bolzano
Trento
Umbria
Umbria
Perugia
Terni
Valle d'Aosta
Valle d'Aosta
Aosta
Veneto
Veneto
Belluno
Padova
Rovigo
Treviso
Venezia
Verona
Vicenza
Estero
Estero
Austria
Belgio
Brasile
Danimarca
Emirati Arabi
Finlandia
Francia
Germania
Inghilterra
Irlanda
Lussemburgo
Norvegia
Paesi Bassi
Portogallo
Repubblica Ceca
Malta
Romania
Spagna
Svezia
Svizzera
Stati Uniti
Ungheria
MISTRESS TRANSEX
Abruzzo
Abruzzo
Chieti
L'Aquila
Pescara
Teramo
Basilicata
Basilicata
Matera
Potenza
Calabria
Calabria
Catanzaro
Cosenza
Crotone
Reggio Calabria
Vibo Valentia
Campania
Campania
Avellino
Benevento
Caserta
Napoli
Salerno
Emilia Romagna
Emilia Romagna
Bologna
Ferrara
Forli-Cesena
Modena
Parma
Piacenza
Ravenna
Reggio Emilia
Rimini
San Marino
Friuli Venezia Giulia
Friuli Venezia Giulia
Gorizia
Pordenone
Trieste
Udine
Lazio
Lazio
Frosinone
Latina
Rieti
Roma
Viterbo
Liguria
Liguria
Genova
Imperia
La Spezia
Savona
Lombardia
Lombardia
Bergamo
Brescia
Como
Cremona
Lecco
Lodi
Mantova
Milano
Monza-Brianza
Pavia
Sondrio
Varese
Marche
Marche
Ancona
Ascoli Piceno
Fermo
Macerata
Pesaro-Urbino
Molise
Molise
Campobasso
Isernia
Piemonte
Piemonte
Alessandria
Asti
Biella
Cuneo
Novara
Torino
Verbano Cusio Ossola
Vercelli
Puglia
Puglia
Bari
Barletta Andria Trani
Brindisi
Foggia
Lecce
Taranto
Sardegna
Sardegna
Cagliari
Carbonia-Iglesias
Nuoro
Olbia Tempio
Oristano
Medio Campidano
Sassari
Ogliastra
Sicilia
Sicilia
Agrigento
Caltanissetta
Catania
Enna
Messina
Palermo
Ragusa
Siracusa
Trapani
Toscana
Toscana
Arezzo
Firenze
Grosseto
Livorno
Lucca
Massa Carrara
Pisa
Pistoia
Prato
Siena
Trentino Alto Adige
Trentino Alto Adige
Bolzano
Trento
Umbria
Umbria
Perugia
Terni
Valle d'Aosta
Valle d'Aosta
Aosta
Veneto
Veneto
Belluno
Padova
Rovigo
Treviso
Venezia
Verona
Vicenza
Estero
Estero
Austria
Belgio
Brasile
Danimarca
Emirati Arabi
Finlandia
Francia
Germania
Inghilterra
Irlanda
Lussemburgo
Norvegia
Paesi Bassi
Portogallo
Repubblica Ceca
Malta
Romania
Spagna
Svezia
Svizzera
Stati Uniti
Ungheria
TRANSEX ESCORT
Abruzzo
Abruzzo
Chieti
L'Aquila
Pescara
Teramo
Basilicata
Basilicata
Matera
Potenza
Calabria
Calabria
Catanzaro
Cosenza
Crotone
Reggio Calabria
Vibo Valentia
Campania
Campania
Avellino
Benevento
Caserta
Napoli
Salerno
Emilia Romagna
Emilia Romagna
Bologna
Ferrara
Forli-Cesena
Modena
Parma
Piacenza
Ravenna
Reggio Emilia
Rimini
San Marino
Friuli Venezia Giulia
Friuli Venezia Giulia
Gorizia
Pordenone
Trieste
Udine
Lazio
Lazio
Frosinone
Latina
Rieti
Roma
Viterbo
Liguria
Liguria
Genova
Imperia
La Spezia
Savona
Lombardia
Lombardia
Bergamo
Brescia
Como
Cremona
Lecco
Lodi
Mantova
Milano
Monza-Brianza
Pavia
Sondrio
Varese
Marche
Marche
Ancona
Ascoli Piceno
Fermo
Macerata
Pesaro-Urbino
Molise
Molise
Campobasso
Isernia
Piemonte
Piemonte
Alessandria
Asti
Biella
Cuneo
Novara
Torino
Verbano Cusio Ossola
Vercelli
Puglia
Puglia
Bari
Barletta Andria Trani
Brindisi
Foggia
Lecce
Taranto
Sardegna
Sardegna
Cagliari
Carbonia-Iglesias
Nuoro
Olbia Tempio
Oristano
Medio Campidano
Sassari
Ogliastra
Sicilia
Sicilia
Agrigento
Caltanissetta
Catania
Enna
Messina
Palermo
Ragusa
Siracusa
Trapani
Toscana
Toscana
Arezzo
Firenze
Grosseto
Livorno
Lucca
Massa Carrara
Pisa
Pistoia
Prato
Siena
Trentino Alto Adige
Trentino Alto Adige
Bolzano
Trento
Umbria
Umbria
Perugia
Terni
Valle d'Aosta
Valle d'Aosta
Aosta
Veneto
Veneto
Belluno
Padova
Rovigo
Treviso
Venezia
Verona
Vicenza
Estero
Estero
Austria
Belgio
Brasile
Danimarca
Emirati Arabi
Finlandia
Francia
Germania
Inghilterra
Irlanda
Lussemburgo
Norvegia
Paesi Bassi
Portogallo
Repubblica Ceca
Malta
Romania
Spagna
Svezia
Svizzera
Stati Uniti
Ungheria
LINKS
Top Boys Class
Top Escort Class
Top Girls Class
Top Mistress Class
Top Trans Class
Top Trav Class
CONTATTI
Accedi
Italia
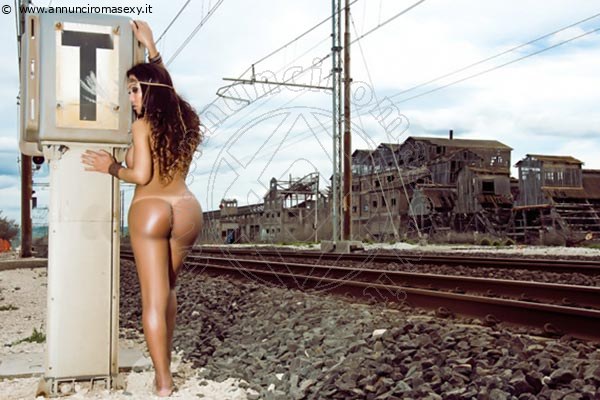
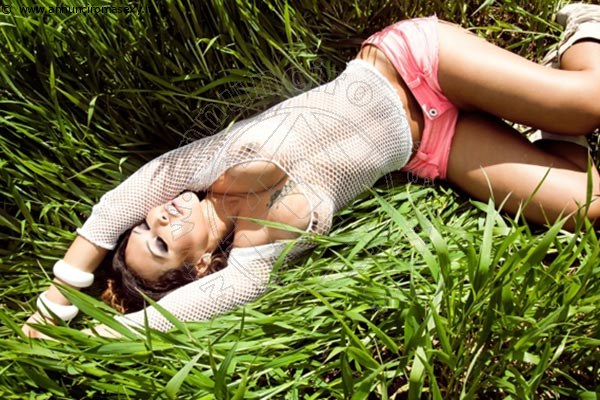
Isabella Dumond
Isabella Dumond
MENU
HOME
GALLERY
HOT
VIDEO
WAP
APP
1
2
3
4
5
6
7
8
9
10
Galleria foto 3 di 10
1
2
3
4
5
6
7
8
9
10
×
Close
Accedi o Registrati
Email
Password
Accedi
Ricordami
Errore
Attendere prego
Non hai un account?
Registrati ora!


